


Did you know that many water heater issues can stem from simple power supply problems? Troubleshooting a malfunctioning water heater in Norfolk, VA, doesn’t have to be overwhelming. You can often identify and resolve the issue by following a few straightforward steps. However, some situations may require professional help. Let’s explore effective ways to get your water heater back in working order.
Check the Power Supply
Before diving into more complex troubleshooting, it’s essential to check the power supply to your water heater.
Start by ensuring that the unit is plugged in, if it’s electric. Check the breaker box to see if the circuit has tripped; reset it if necessary. If you’ve got a gas water heater, confirm that the gas supply is on. Look for any gas leaks—if you smell gas, evacuate the area and call a professional immediately.
Next, inspect the power cord for any visible damage. If you notice frayed wires or bent prongs, it’s time to replace it.
Additionally, if your water heater has a reset button, press it to see if that resolves the issue. Remember that a reliable water heater is crucial for daily comfort and convenience, so addressing power supply issues promptly is important.
Inspect the Thermostat Settings
Before you troubleshoot further, check your thermostat settings to make sure they’re adjusted properly.
You won’t get hot water if the temperature’s too low.
If everything looks good but you’re still having issues, consider resetting the thermostat to see if that helps. Additionally, early detection of issues can save you money on costly repairs in the long run.
Check Temperature Setting
Have you checked the thermostat settings on your water heater?
It’s a simple step that can often solve your problem. If the temperature is set too low, you mightn’t get hot water when you need it.
Most water heaters should be set between 120°F and 140°F for ideal performance.
To check, locate the thermostat on your unit, which is usually found on the side or front. Use a screwdriver to adjust the setting if necessary.
Make sure to wait a few hours to see if the water heats up properly.
If you’ve adjusted the thermostat and still face issues, it might be time to explore other troubleshooting steps or call a professional for help.
Reset Thermostat If Necessary
If adjusting the thermostat didn’t resolve your hot water issues, it might be time to reset the thermostat.
First, locate the reset button, usually found on the water heater’s control panel. Press and hold it for a few seconds until you hear a click or see a light indicator, signaling it’s reset.
Afterward, check the temperature settings again to verify they’re set correctly—typically between 120°F and 140°F is ideal.
Wait for about 30 minutes to see if the hot water returns. If you still don’t have hot water, it could indicate a more serious issue.
Don’t hesitate to reach out to a professional, like Get Lit Electrical, Plumbing & Water Heater Repair, for expert assistance.
Examine the Circuit Breaker or Fuse
Examining the circuit breaker or fuse is one of the first steps in troubleshooting your broken water heater. A tripped breaker or blown fuse might be the culprit behind your hot water woes.
Head to your electrical panel and look for any breakers that are in the “off” position or show signs of tripping. If you spot one, flip it back on. Make sure to check the fuse box as well; replace any blown fuses with ones that match the amperage rating.
If the breaker trips again or the fuse blows repeatedly, don’t ignore this warning. It could indicate a deeper electrical issue that needs professional attention. Outdated breakers can pose safety risks and may require an upgrade for optimal performance.
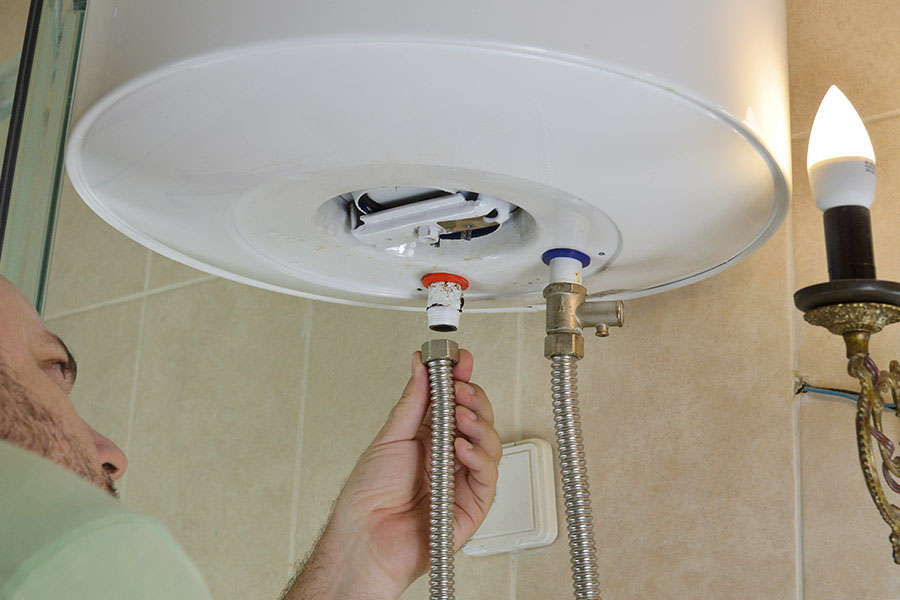
Look for Leaks or Corrosion
Checking for leaks or corrosion is essential when troubleshooting your water heater.
Start by inspecting the tank and surrounding pipes for any signs of water pooling or dampness. If you spot a leak, it could indicate a serious issue that requires immediate attention.
Next, look for rust or corrosion, especially around the connections and fittings. Discoloration or flaking may suggest that your water heater is nearing the end of its lifespan or has been compromised.
Don’t forget to examine the temperature and pressure relief valve, as leaks can also occur here. If you notice any corrosion, it’s crucial to address it quickly to prevent further damage.
Tightening loose fittings or replacing corroded parts might resolve the issue. If you’re unsure or if the problem persists, calling a professional like Get Lit Electrical, Plumbing & Water Heater Repair can help guarantee your water heater operates safely and efficiently. Advanced leak detection technology can also assist in identifying hidden leaks that may not be immediately visible.
Flush the Tank to Remove Sediment
Flushing your water heater regularly is essential for maintaining its efficiency and longevity.
Over time, sediment can build up in the tank, leading to issues that could cause costly repairs.
Let’s go through a simple step-by-step guide to help you tackle this important task.
Importance of Regular Flushing
Regularly flushing your water heater is crucial for maintaining its efficiency and longevity.
Over time, sediment builds up in the tank, which can lead to decreased heating performance and increased energy costs. When you flush the tank, you remove this sediment, helping your water heater operate smoothly.
This simple maintenance task can prevent issues like rust and corrosion, ultimately extending the life of your unit. Plus, it guarantees that you get hot water when you need it without any delays.
Step-by-Step Flushing Guide
To keep your water heater running efficiently, follow these simple steps to flush the tank and remove sediment.
First, turn off the power supply or disconnect the gas. Next, locate the cold water supply valve and shut it off.
Attach a garden hose to the drain valve at the bottom of the tank, directing the other end outside or into a bucket. Open the drain valve and let the water flow out.
After the tank empties, briefly open the cold water supply valve to stir up sediment, then drain again. Repeat this process until the water runs clear.
Finally, close the drain valve, remove the hose, and restore the power or gas supply. Your water heater will thank you!
Test the Heating Elements
Testing the heating elements in your water heater is an important step to confirm it’s functioning properly. First, turn off the power to the unit to guarantee safety.
For electric water heaters, access the heating elements by removing the access panels. Use a multimeter to check the resistance of each element. If the reading is zero or infinite, that element is broken and needs replacement.
If you’re dealing with a gas water heater, check the burner for any blockages and verify the pilot light is on. If it’s not igniting, the thermocouple might be faulty.
After testing, if you find any issues with the heating elements, it’s vital to replace them promptly to restore hot water.
Regularly testing these components can help prevent future problems and make sure your water heater runs efficiently. Remember, a little maintenance goes a long way in avoiding costly repairs.
Call a Professional for Complex Issues
When your water heater shows signs of complex issues, it’s best not to tackle them alone.
Maybe you’ve noticed unusual noises, leaks, or inconsistent temperatures. These problems can indicate underlying issues that require expert knowledge and tools to fix. Attempting to resolve them yourself might lead to further complications or safety hazards.
Calling a professional like Get Lit Electrical, Plumbing & Water Heater Repair is a smart choice. Our licensed technicians have the experience to diagnose and repair water heater problems efficiently.
We recognize your home’s unique needs and can identify issues you might overlook. We also believe in clear communication, ensuring you grasp the problem and the solution.
Conclusion
To sum up, troubleshooting your broken water heater can save you time and money. For instance, a Norfolk homeowner noticed their water was lukewarm. After checking the thermostat and flushing the tank, they found sediment buildup was the culprit. By tackling the issue themselves, they avoided a costly repair bill. Remember, if the problem seems too complex, don’t hesitate to call in a professional. Keeping your water heater in top shape guarantees hot showers when needed!